Installation and Initial Setup
Welcome to the Initial Setup section of xpressifi. On this page, you will find a step-by-step guide to install and configure our app in your Shopify store, ensuring you're ready to start issuing invoices automatically in compliance with Portuguese tax regulations.
How to Install the App on Shopify
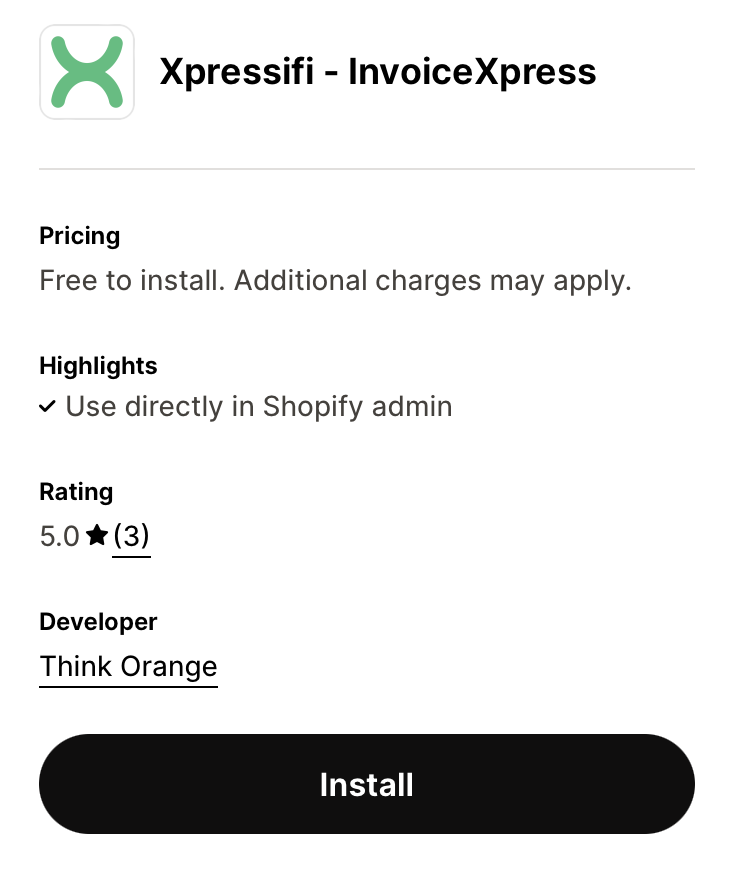
1. Access the xpressifi page on the App Store
Installation always begins on the app’s page in the Shopify App Store. There are two ways to get there:
- Clicking the button below

- Going to the Shopify App Store and searching for "xpressifi"
2. Add the app to your store
On the app page, click "Install":
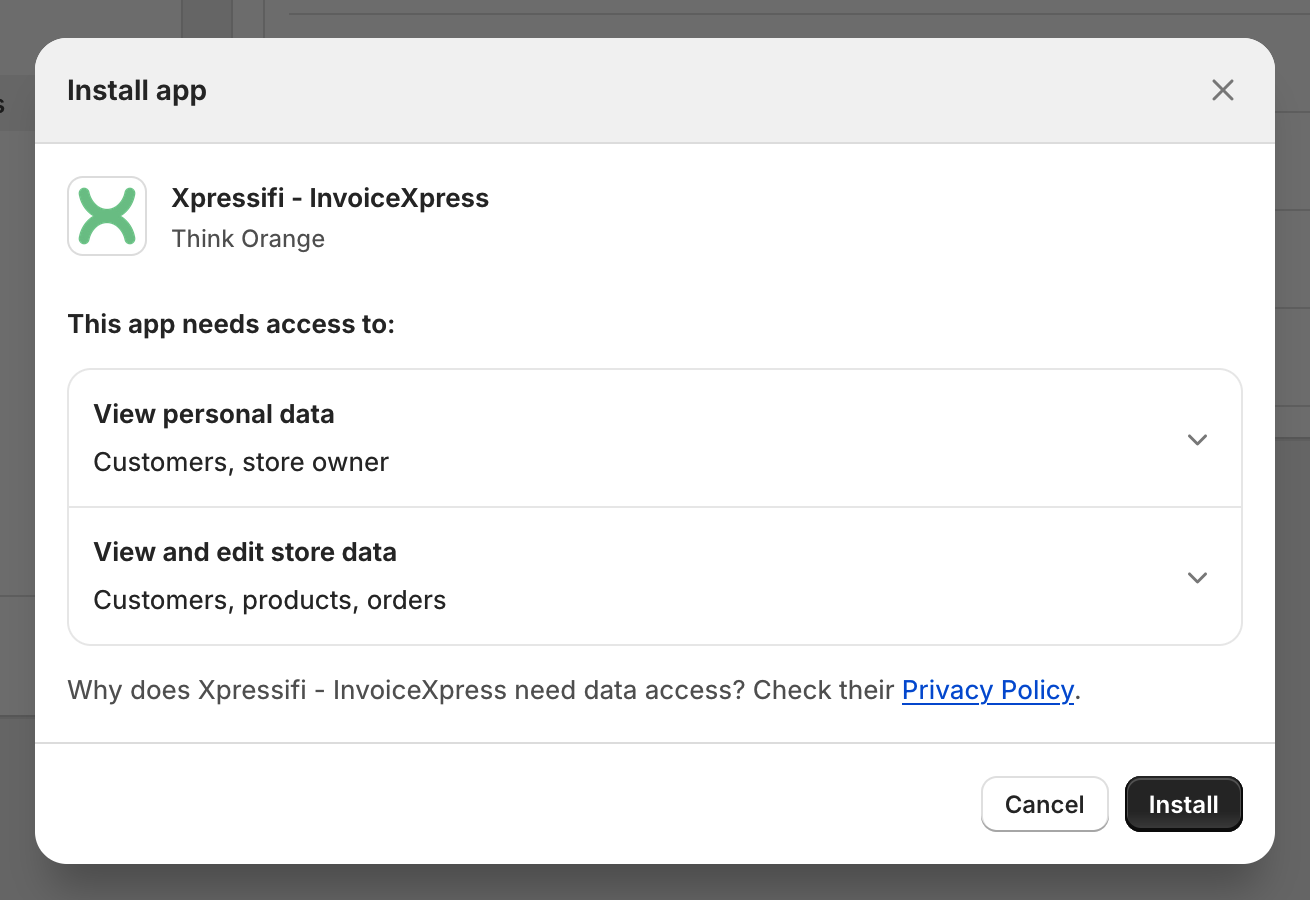
Follow the instructions to authorize the installation in your Shopify store:
Initial Setup → Onboarding
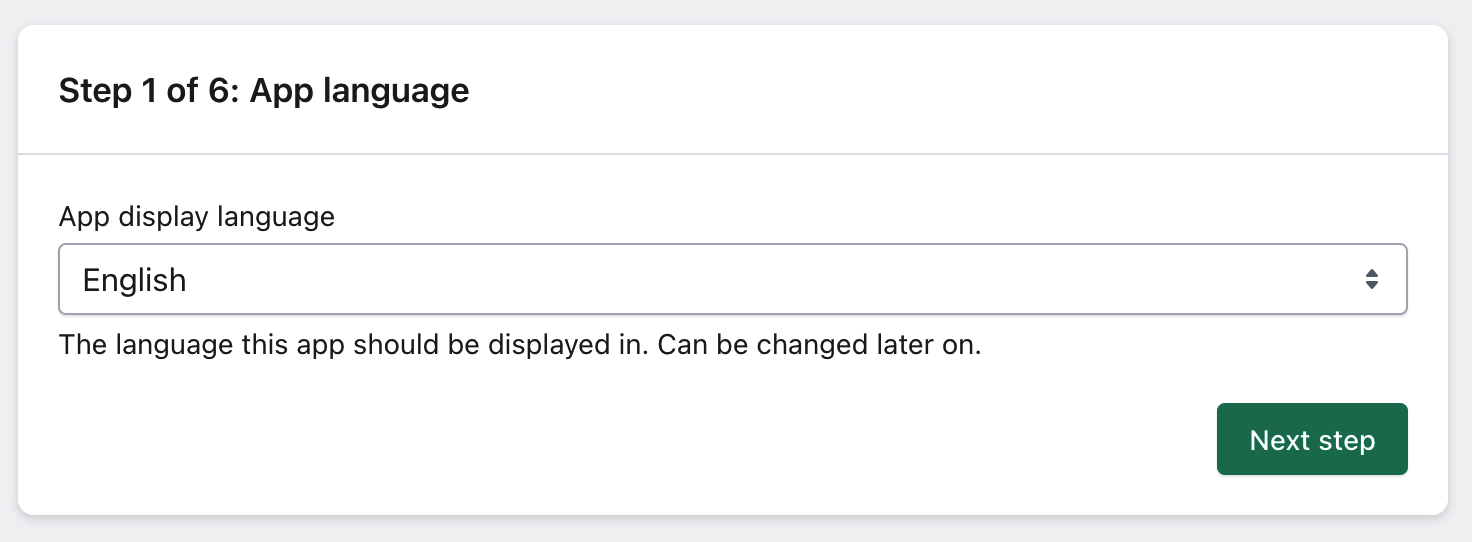
After installation, you'll be redirected to the app's initial setup process. This step is essential to ensure the app is correctly configured for your Shopify store and your InvoiceXpress invoicing software.
Step 1: Application Language
Select the language you want to use for the app. xpressifi is available in Portuguese and English.
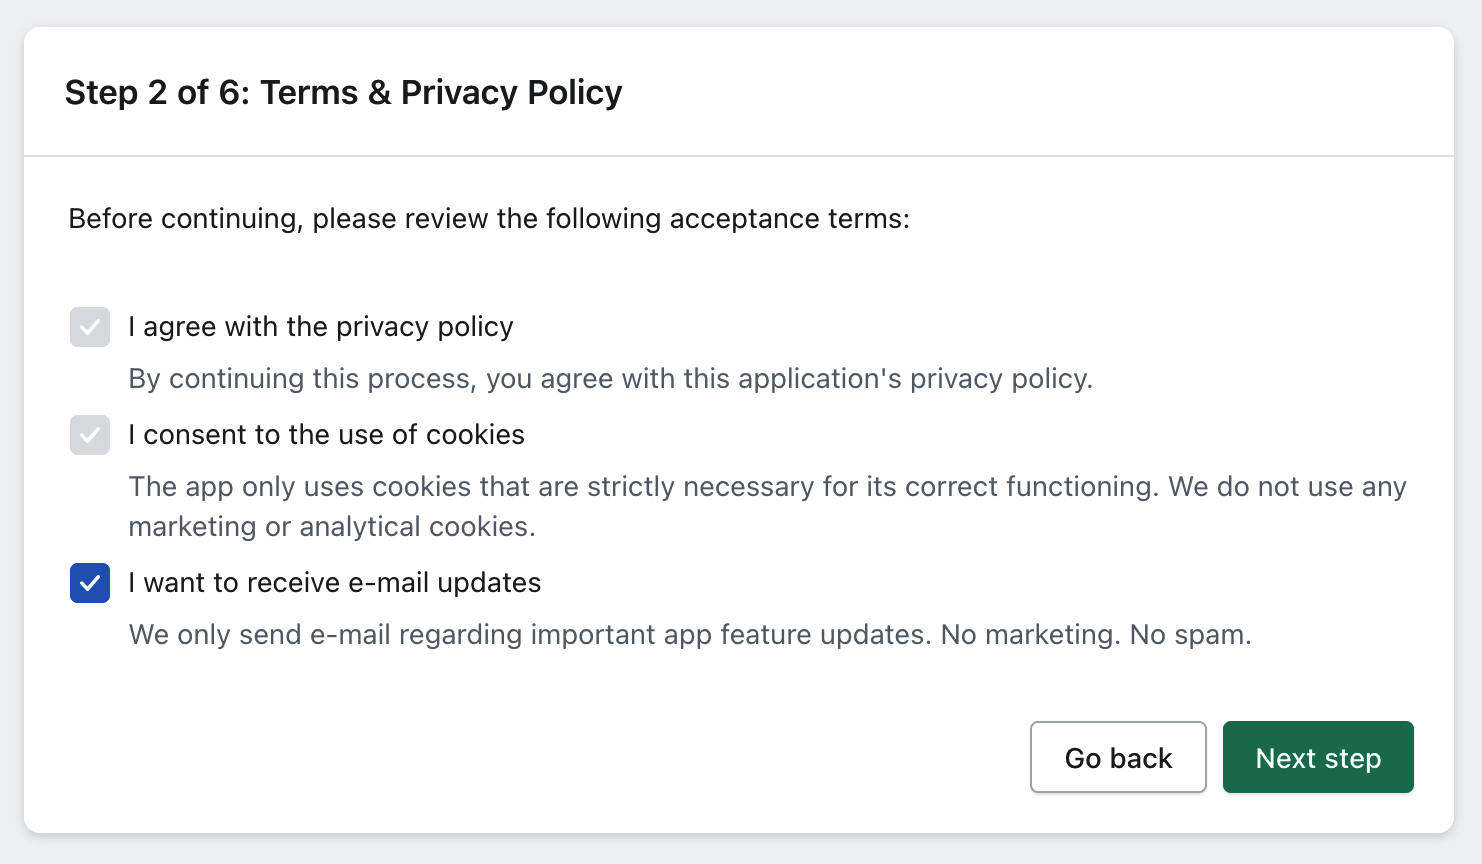
Step 2: Privacy Policy, Terms of Use, and Updates
We recommend reading our Privacy Policy and Terms of Use carefully before proceeding. You can also choose to receive updates and news about the app via email.
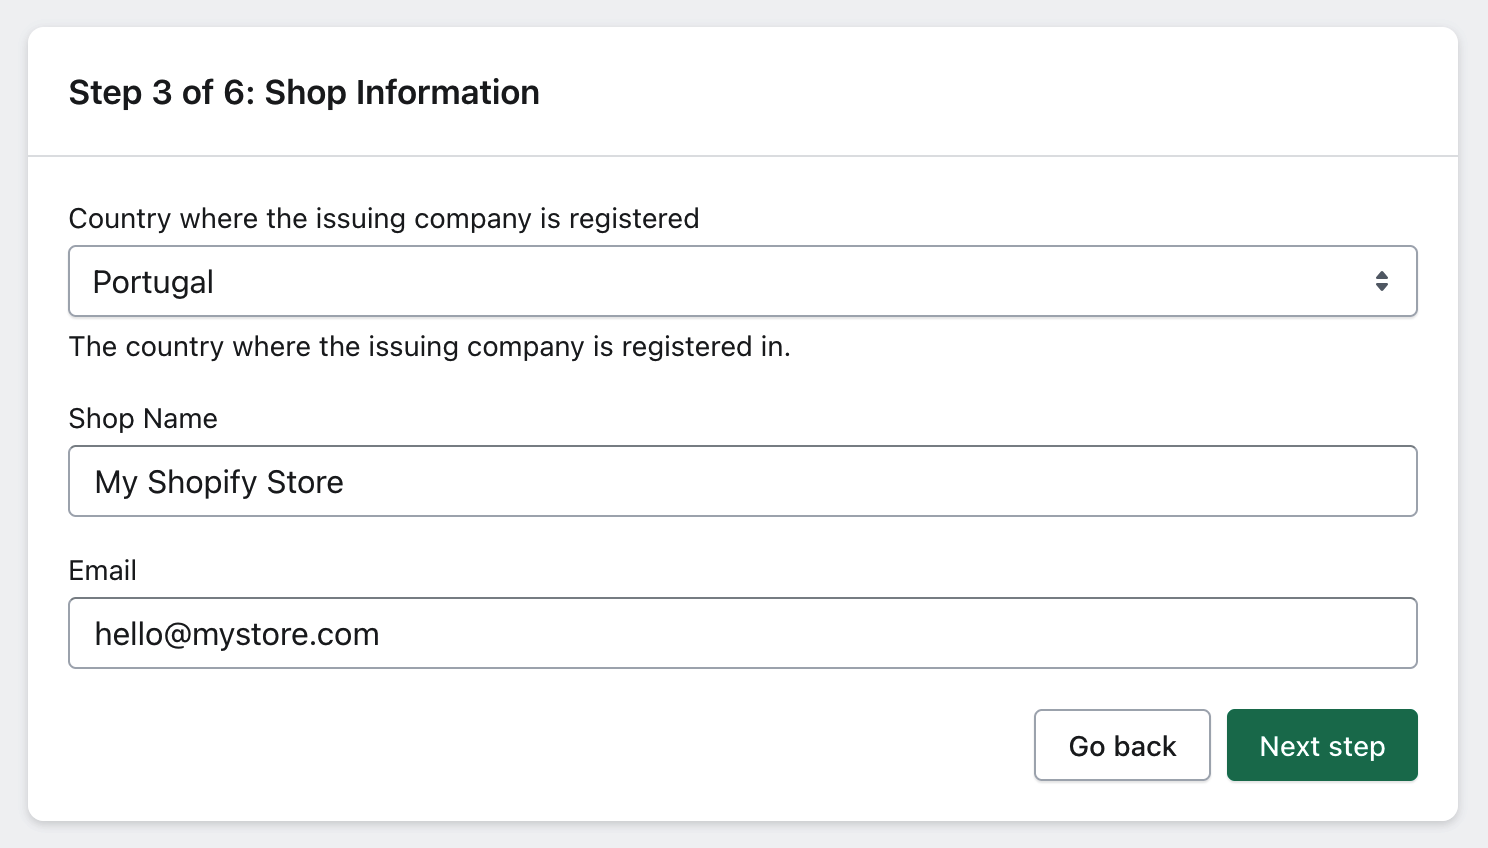
Step 3: Store Information
Confirm your basic Shopify store details. If necessary, you can edit the information before proceeding.
Step 4: Connect to InvoiceXpress
For the app to automatically issue invoices, you need to connect your InvoiceXpress account. Enter the account name and API key to establish the connection.
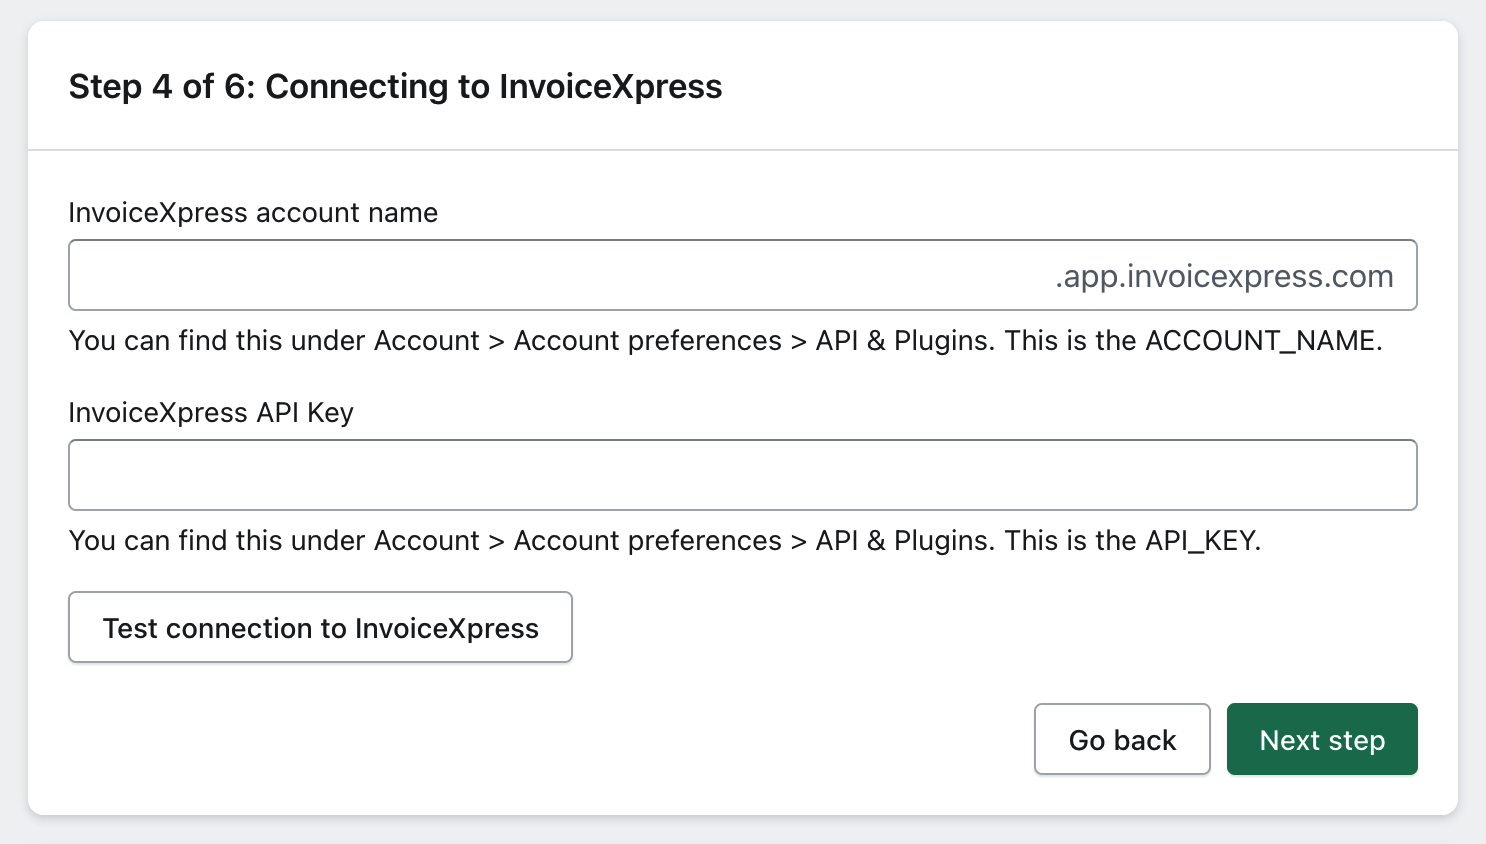
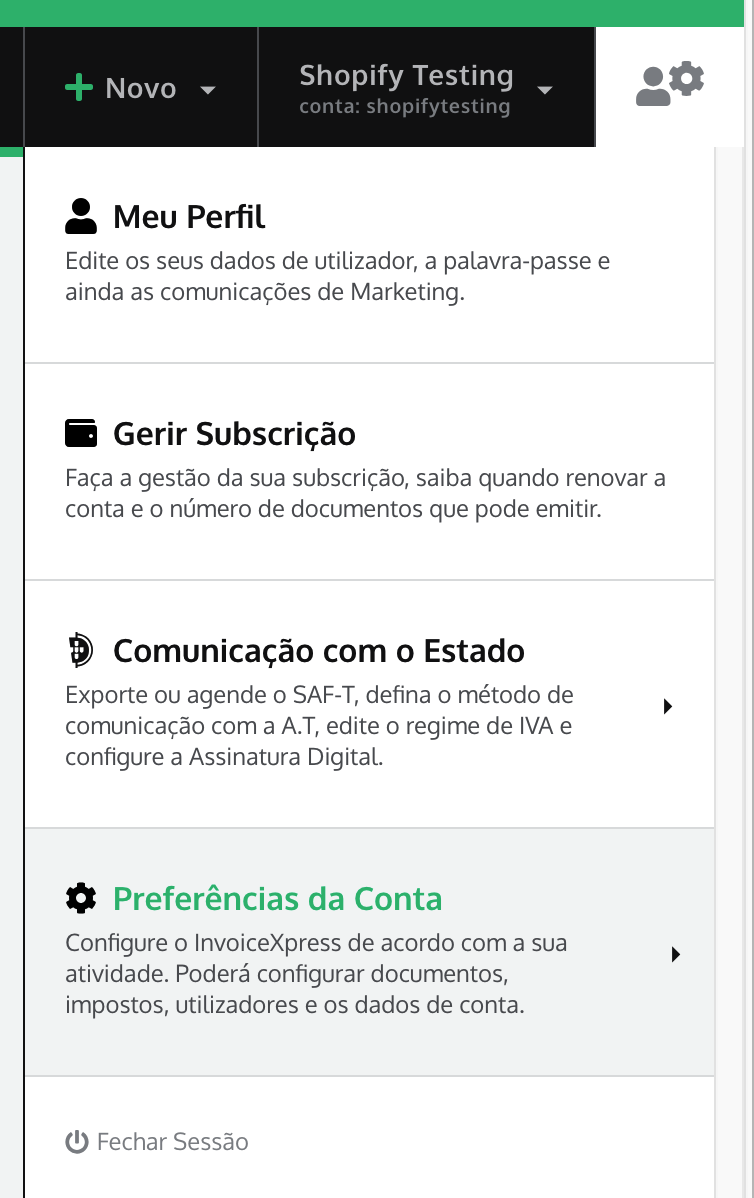
To obtain the API key, log into your InvoiceXpress account and follow the steps below:
- Log into your InvoiceXpress account.
-
Click on the settings icon in the top right corner
-
Click "Account Preferences"
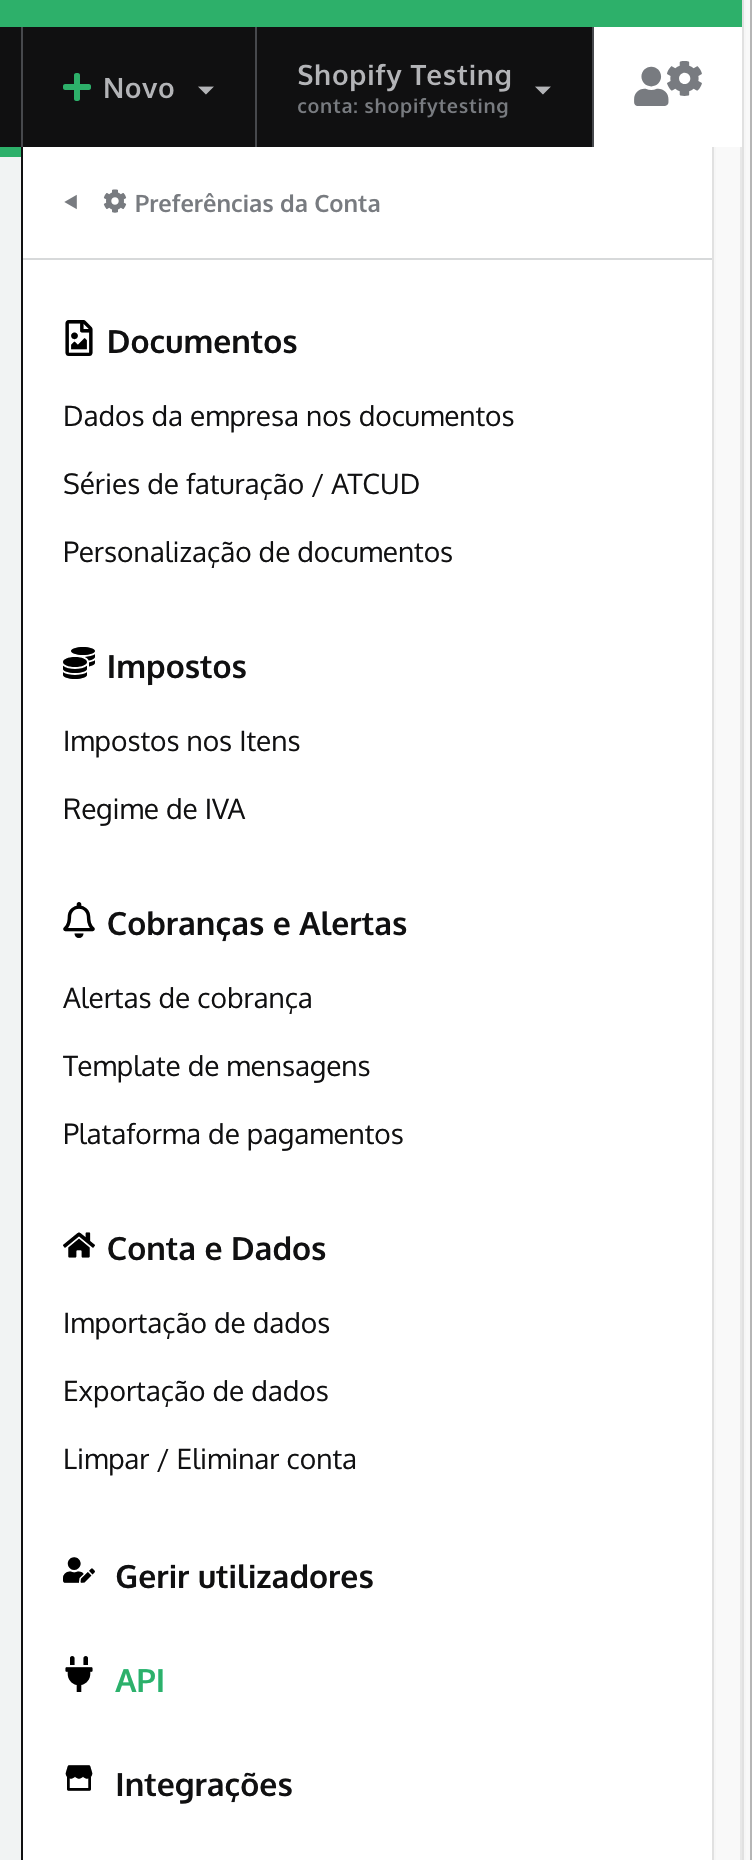
- Click on "API"
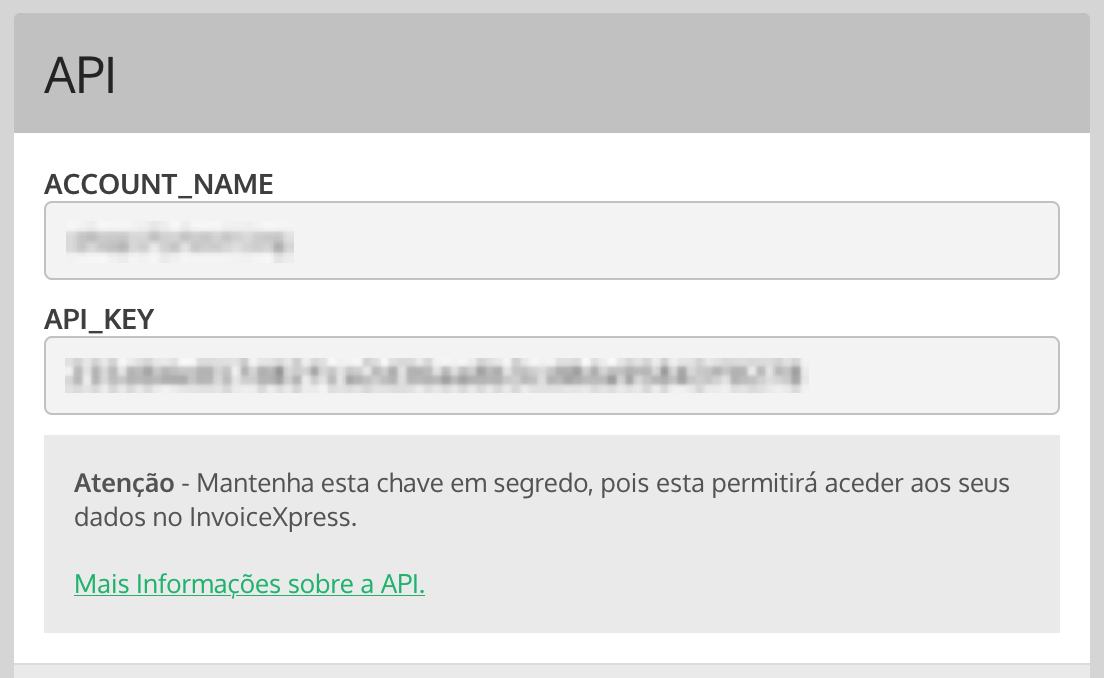
Next, copy the ACCOUNT_NAME and API_KEY values into xpressifi.
Finally, you can test the connection to InvoiceXpress to ensure the parameters were entered correctly.

Step 5: Document Series
Define the document series you wish to use for the invoices issued by the app.

The listed series are pulled directly from InvoiceXpress. To use a different series than those listed, it must first be created in your InvoiceXpress account.
Step 6: Subscription and Trial Period
Here's the final information regarding the next steps and relevant details about the app's trial period.
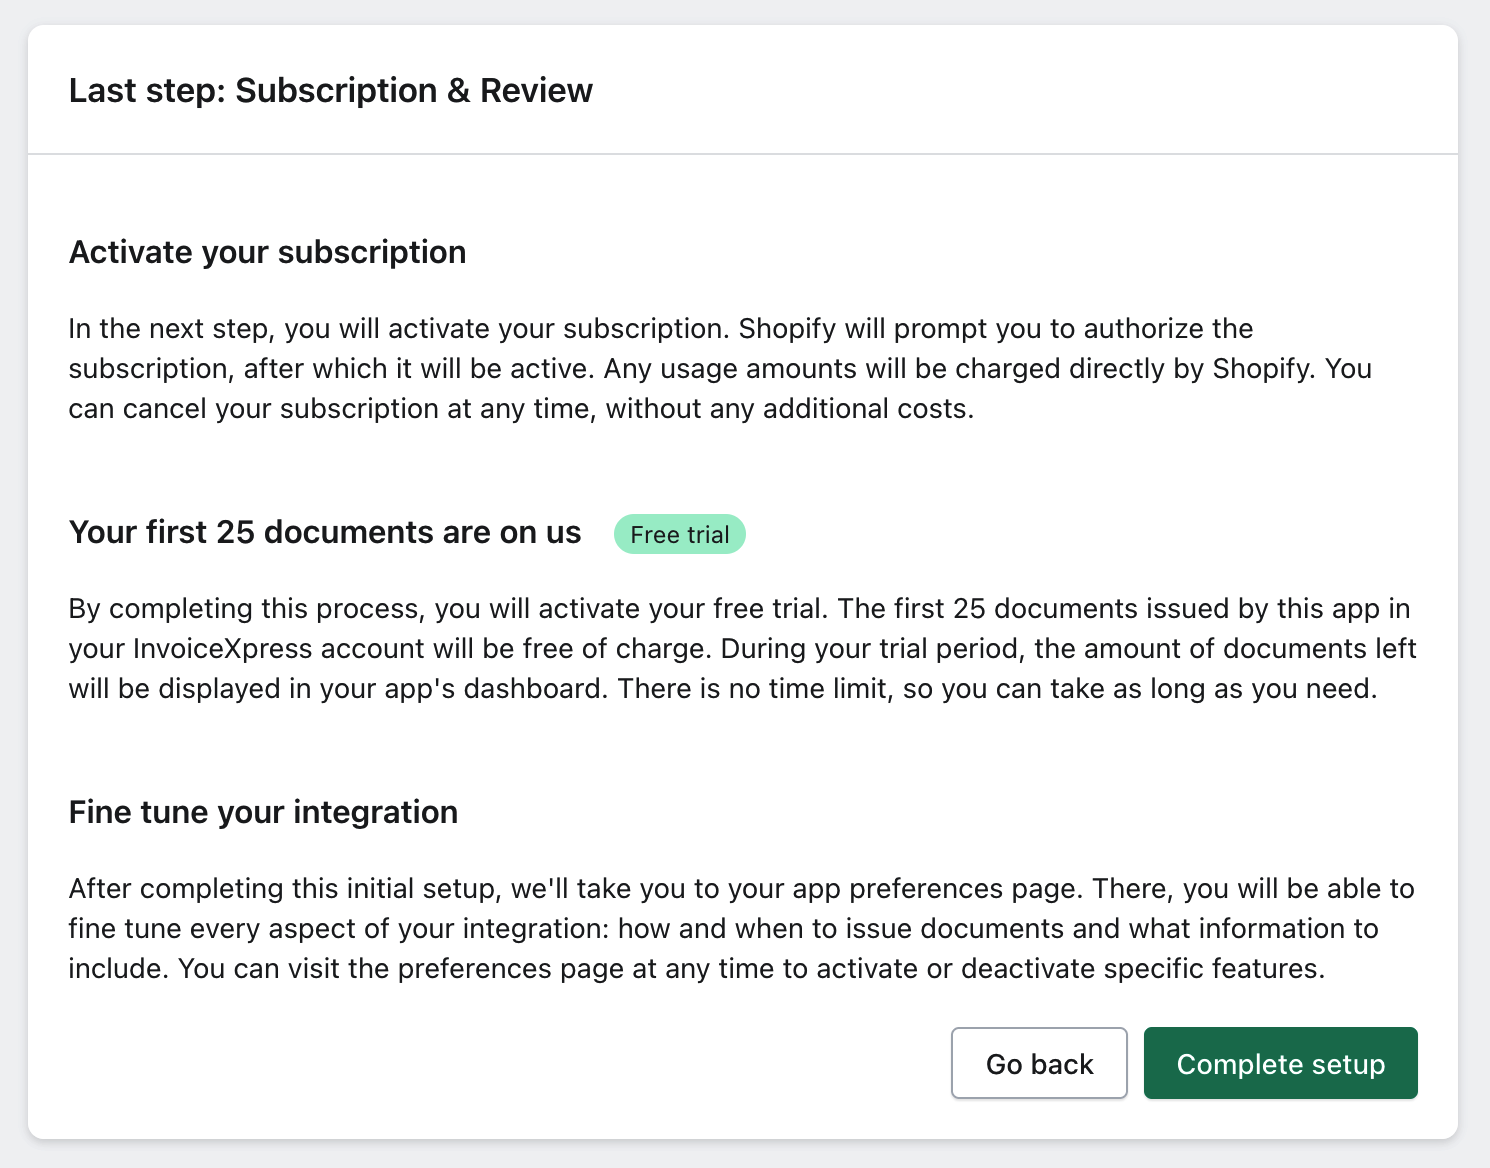
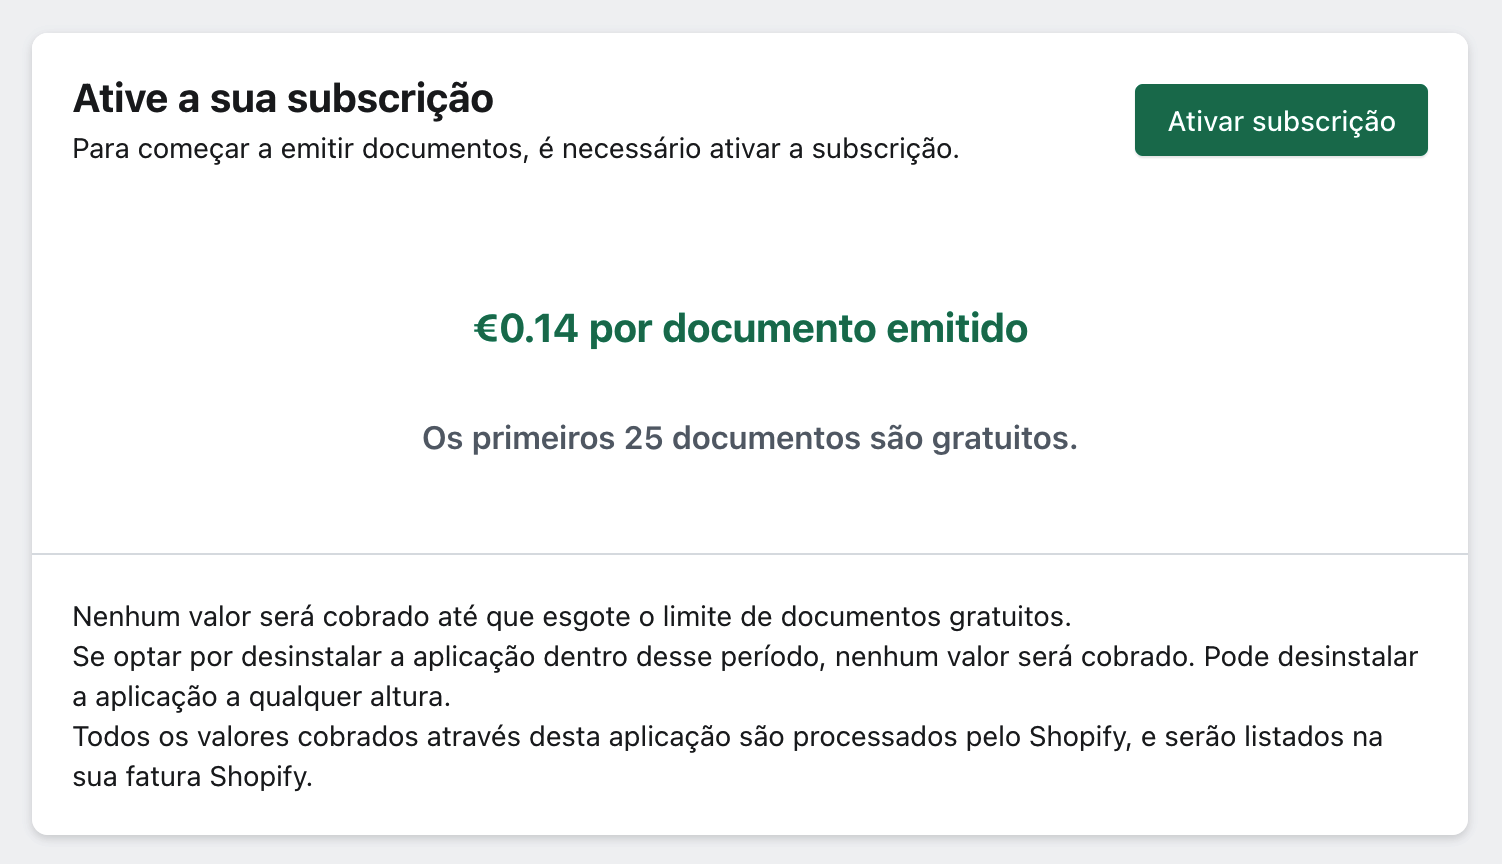
Step 7: Activate Subscription
Review the details of the app's billing model.
Step 8: Approve Subscription on Shopify
Shopify will present the plan information you are subscribing to.
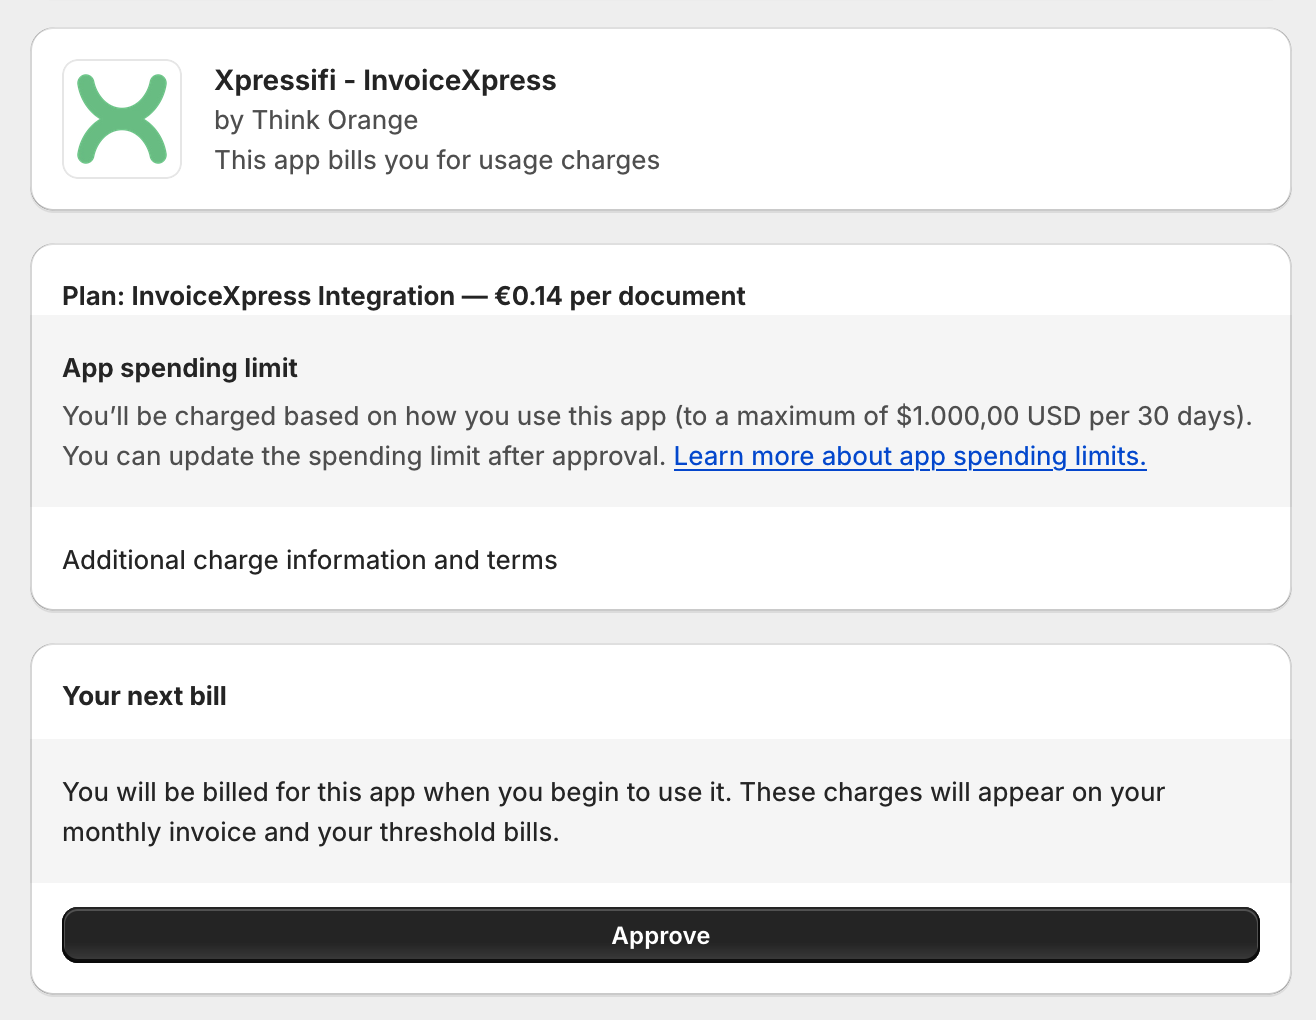
You will need to approve the subscription to complete the installation.
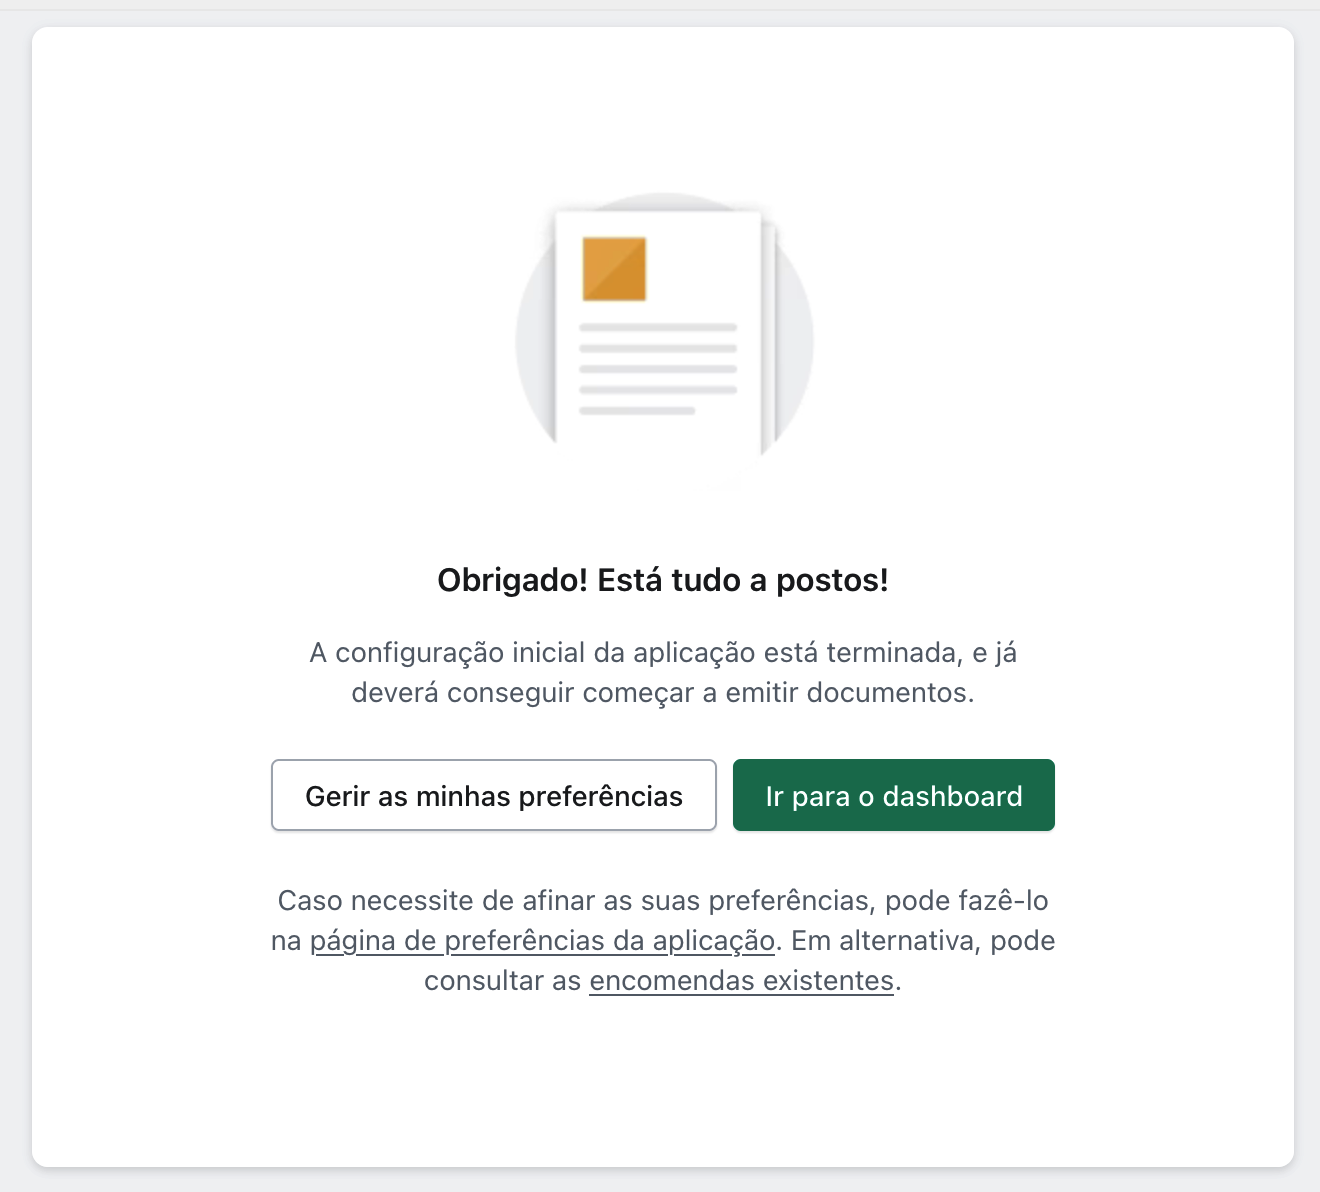
Process Complete
Once the subscription is approved, the app will be ready to use. You can start issuing invoices automatically from your Shopify store.
Important Notes About Subscription
All charges for using xpressifi are billed directly by Shopify. The detailed charges for xpressifi will be listed on your Shopify invoice.
This subscription is independent of any plan you may have subscribed to on InvoiceXpress. In addition to the xpressifi subscription, you will need an active plan on InvoiceXpress for the app to issue documents.
Think Orange, the company responsible for the creation, development, and maintenance of xpressifi, is an independent entity and not affiliated with InvoiceXpress.